Tuesday 29 November 2011

History Street - Bayko Brick House


Today R built these houses using a toy first manufactured in 1935; Bayko building sets. I have a set that belonged to my mother as a child which was made post 1960 and another set purchased from a car boot sale which dates somewhere between 1935-1959. Find out a bit more about the history of the toy here.


First we took a look at all the pieces and chose a simple model to construct.


Building the models involved lots of fine motor skills, measuring (to choose the base rods), and following plans. 

Here R is following the instructions and adding the metal rods to a base board to create the frame of the house. Next he slides bricks, windows and doors into position. 


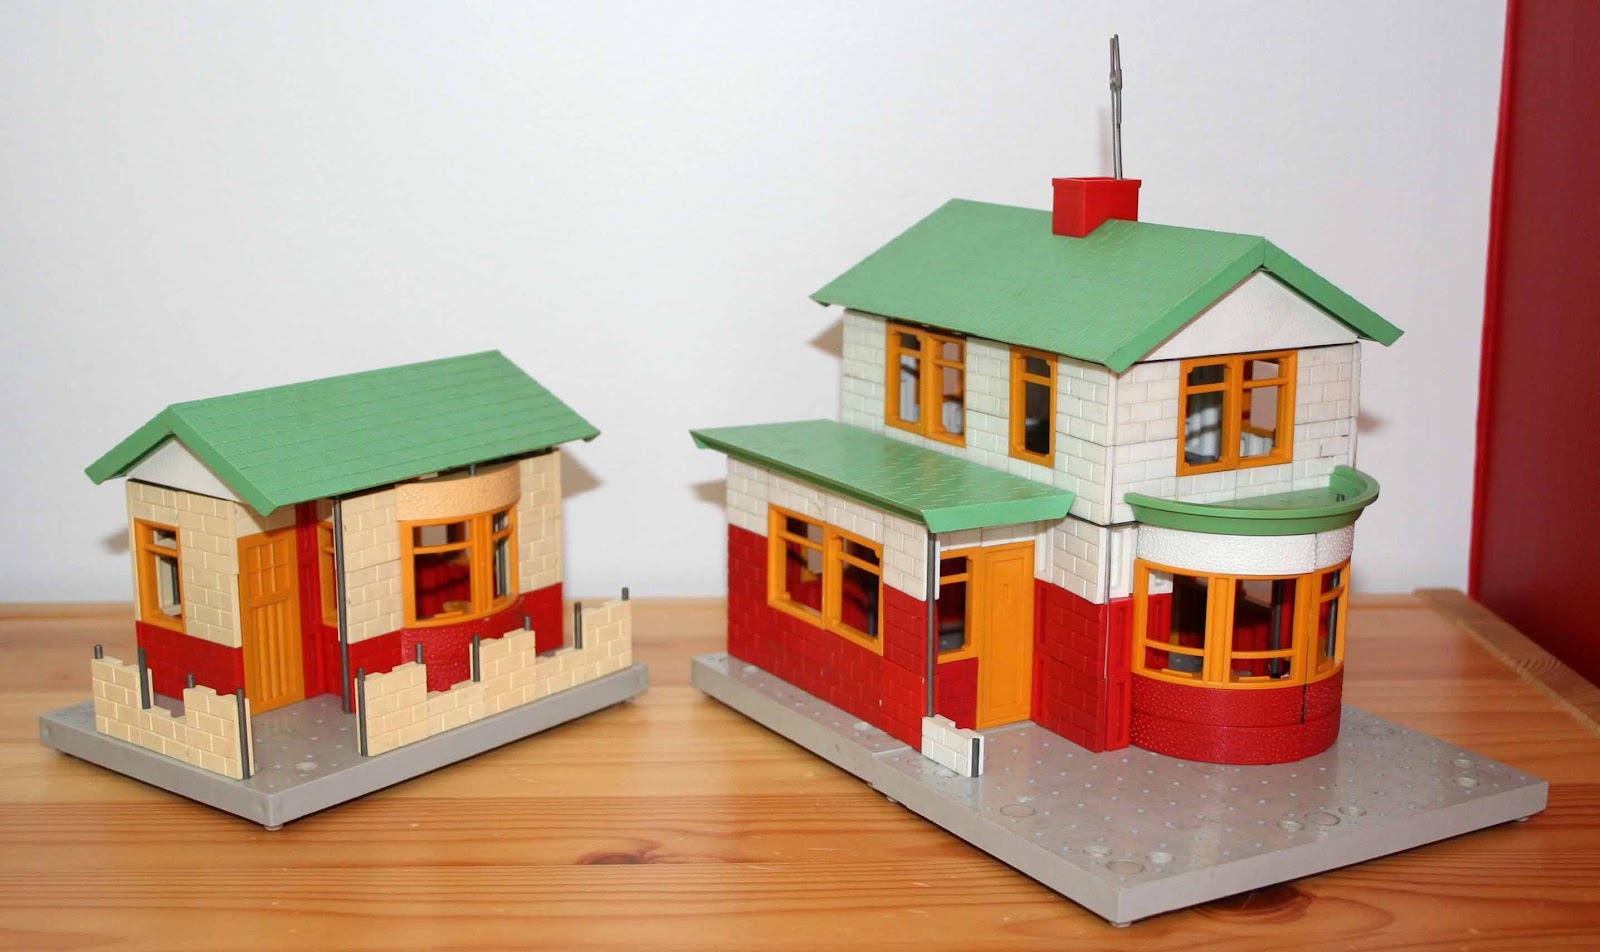
We tried a trickier two storey model too. Here are the results:


Our history street now has several different buildings from a range of time periods.

Friday 25 November 2011

History Street - Medieval Hall


We have spent a couple of days making a medieval hall with our own version of wooden beams, wattle and daub. It was a real family project with everyone getting hands-on.

First we researched how the houses were made and then constructed the "oak" frame from lolly sticks.


Next we constructed the woven "willow" wattle from straws and pipe cleaners. This was very fiddly and would have been easier if we had constructed the walls before they were joined together to make the house, however it's more authentic this way!


The beams were painted black to make them look more realistic. We then added our version of "mud, clay and straw" daub using tile grout.


Finally we glued on our roof  "tiles" which were made from squares of card cut out with a craft punch.


I think the children learnt a lot about the process of building the house even if the materials were not authentic, and it looks pretty good too.

Saturday 12 November 2011

Sculpture By The Sea


Today we went to Sculpture By The Sea at Bondi beach. There are hundreds of sculptures on display along the cliff top walk and inside the marquee in the park. Here is a small selection of our favourites.


Thursday 10 November 2011

River Pebble Geology

Today we joined our friends at the Grose river for a geology class led by...me! First the children collected as many different rocks as they could. We then classified the rocks by size into boulders, cobbles, pebbles, granules, and sands. We used a grain size chart to help us.


We then talked about how the rocks had got to the area and the different types of currents that had transported them.


We then grouped the rocks according to roundness (see chart top of page) and discussed why some were more rounded than others including the distance they had travelled and their hardness.

We then had a look at the sands and gravels and I encouraged the children to name their sample. Most came up with "poorly sorted very course sand". We talked about how giving a description and a name for their sample would help other scientists to understand what they were talking about.

Finally we had a quick discussion about what the rocks sands were made from and how they would be changed in the rock cycle.

Wednesday 9 November 2011

Mosaics

Mosaics by Mum (top), R (left) and L (right)

After making our paper mosaics and Roman villa (see previous posts), we had a go at making a real mosaic.

Supplies:  tiles, wood bases, grout/glue, spatulas - all available at Bunnings

First we spread a layer of grout/glue.


Next we added our tiles and then left it to dry.


Later, once it was dry, we spread more grout over the top.


Then wiped the excess off with a cloth.


Dad wasn't too complimentary about our grouting skills, but it was a quick and easy project so I expect we will make some more.

Tuesday 8 November 2011

Word Hopscotch

This week we drew a hopscotch on our patio; instead of numbers we used our tricky words.


The children threw a bean bag onto a word. Then jumped and hopped on the grid saying the words they landed on as they went. On the way back R spelled out the word he had thrown the beanbag onto.

Monday 7 November 2011

Arch Bridge

This week we made and tested arch bridges. First we tested a flat card bridge. It couldn't even hold a single weight. So to make it stronger we put an arch underneath and placed weights on top again. It held 160g.


We decided to increase the number of arches to two. This time it held 360g.


I found this excellent website which explains how to make a huge arch. Maybe we will have a go at this soon. In the meantime we will try the arch bridge at the science centre.